How to Connect Shopify to Bloomreach Engagement
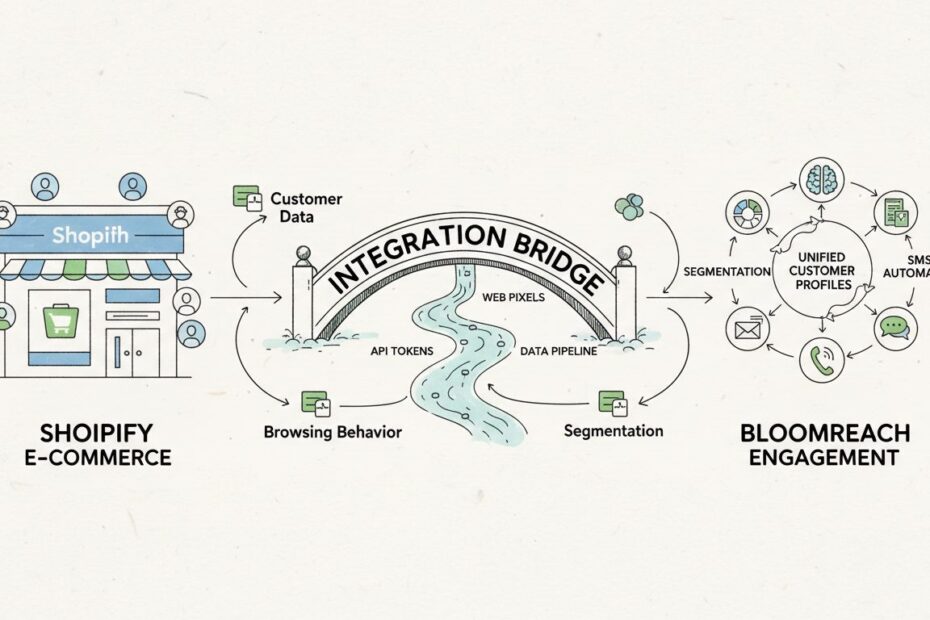
How do you connect Shopify to Bloomreach Engagement? The answer is straightforward: use the native, out-of-the-box integration via the official Bloomreach Email & SMS Marketing app in the Shopify App Store. This connection unifies your Shopify customer data, order history, and real-time behavioral signals inside Bloomreach Engagement, enabling you to build high-converting retention campaigns, advanced segmentation, and omnichannel personalization without manual data pipelines or complex custom code.
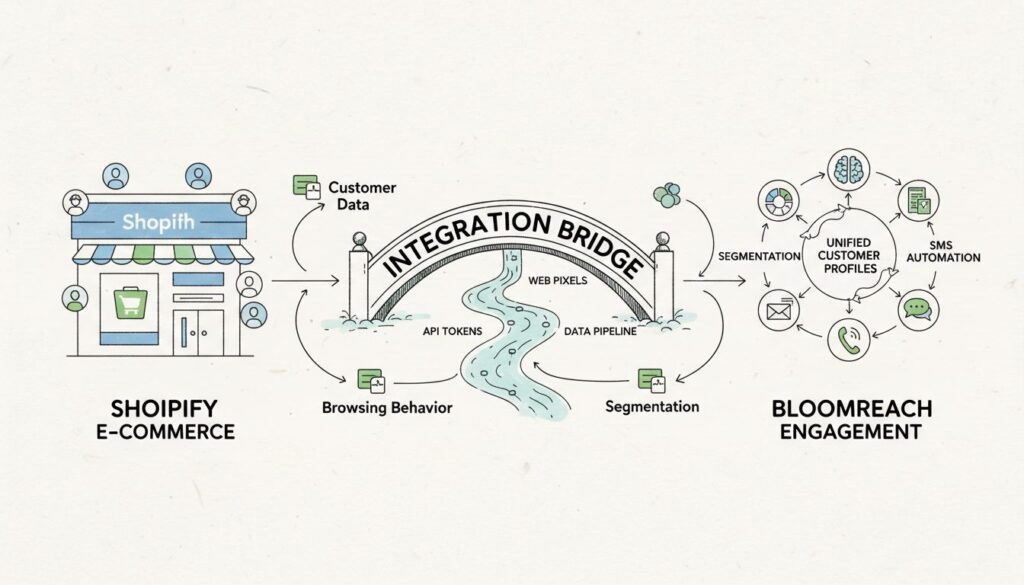
In short: Install the official Bloomreach app in your Shopify admin, authenticate using an encrypted token, enable web pixel tracking, and you instantly gain access to unified customer profiles, real-time purchase data, and on-site behavior signals that power automated email, SMS, and web personalization campaigns.
Beyond Fragmented Data: Why the Shopify and Bloomreach Integration Matters
Most retail brands operate with fragmented customer data. Your e-commerce platform holds transaction history and inventory data. Your email marketing tool holds engagement metrics. Your analytics platform holds behavior signals. None of them talk to each other in real time, so your campaigns lag behind customer reality, your retention strategies rely on guesswork, and your team spends weeks manually syncing data between systems. This fragmentation costs you revenue, customer lifetime value (CLV), and competitive advantage.
The Shopify to Bloomreach Engagement integration solves this problem by creating a unified customer data foundation. When you connect Shopify to Bloomreach, every purchase, cart abandonment, product view, and customer attribute flows instantly into a single customer profile inside Bloomreach. This unified view enables you to segment customers based on real behavioral data, trigger campaigns at the exact moment intent signals appear, and personalize every touchpoint across email, SMS, and web with precision that drives measurable revenue growth.
Bloomreach is purpose-built for this integration. As a Commerce Experience Cloud, Bloomreach specializes in connecting e-commerce platforms like Shopify to marketing automation, customer data, and personalization engines. The native integration is not a third-party connector or API wrapper. It is a first-class feature in Bloomreach Engagement designed specifically for Shopify merchants who need speed, reliability, and native support. This matters because your data flows directly, your syncs are real-time or near-real-time, your webhook updates are instant, and your support team understands the exact technical architecture.
The business impact is immediate. Brands using this integration report faster second-purchase conversion rates, higher email engagement through behavioral segmentation, more accurate abandoned cart recovery, and better customer retention metrics. You are no longer guessing about customer intent. You are responding to it in real time.
Technical Prerequisites Before You Begin the Integration
Before you start the integration process, verify that you have the following in place. These prerequisites prevent permission errors, authentication failures, and data sync issues during connection.
Active Bloomreach Engagement Account: You need an active Bloomreach Engagement subscription. If you do not have one, contact Bloomreach sales to provision your account. Ensure your account is fully activated and you can log into the Bloomreach UI without issues. Your Bloomreach account must include the Engagement module, not just Discovery or Content Personalization.
Working Shopify Store: You need a live Shopify store (either standard Shopify or Shopify Plus). The store must be fully set up with at least basic product catalog data, customer records, and order history. If you are testing on a development store, that works, but ensure it mirrors your production setup closely enough to validate the integration before going live.
Admin Access on Both Platforms: You must have admin-level access to your Bloomreach account (specifically the ability to navigate to Data & Assets and Integrations). You must also have admin access to your Shopify store to install apps and generate API tokens. If you are using Shopify Plus, confirm that your partner account has app installation permissions. Some Shopify Plus environments restrict app installations, so verify this with your Shopify account team before starting.
Stable Internet Connection and Modern Browser: Use a modern browser (Chrome, Firefox, Safari, or Edge) to complete the authentication steps. Avoid older browser versions that may not support OAuth flows properly. Have a stable internet connection, as the integration involves real-time token generation and OAuth redirects.
Clarity on Your Data Privacy and Consent Requirements: Before connecting, review your data privacy obligations under GDPR, CCPA, or other regulations relevant to your market. Bloomreach will sync customer consent states from Shopify, but you need to ensure your Shopify store is already capturing and managing consent correctly. If your consent setup in Shopify is incomplete, the integration will expose that gap.
Step-by-Step Guide to Connecting Shopify to Bloomreach Engagement
Follow these steps in order. Each step is sequential and builds on the previous one. Do not skip steps or jump ahead.
Step 1: Add the Shopify Integration Inside Bloomreach
Log into your Bloomreach Engagement account. Navigate to the main menu and select Data & Assets > Integrations. You will see a list of available integrations. Click the + Add new integration button in the top right corner. Search for “Shopify” in the integration search box. When the Shopify integration appears, click + Add integration next to it.
A modal dialog will open asking you to choose an authentication method. You will see two options: “Official App” and potentially other connection methods. Select Official App to proceed. This is the recommended and most reliable method because it uses Shopify’s native OAuth flow and Bloomreach’s certified app, ensuring secure, real-time data sync and native support.
After selecting Official App, you will see a message confirming your choice and a button labeled Authenticate with Shopify or similar. Click this button. Your browser will redirect you to the Shopify App Store or a Shopify authentication page.
Step 2: Install the Official Bloomreach App in Your Shopify Admin
You are now redirected to the Bloomreach Email & SMS Marketing app page in the Shopify App Store. Review the app description, permissions, and reviews. The app permissions will request access to your customer data, order history, product catalog, and shop settings. This is expected and necessary for the integration to function.
Click the Add app button. Shopify will show you a detailed permissions screen listing exactly what data and actions the Bloomreach app will access. Review these permissions carefully. You will see permissions like “Read and write customer data,” “Read orders,” “Read products,” and “Read shop settings.” These are all required for the integration to sync data and enable tracking. Click Install app to proceed.
After installation completes, the Bloomreach Email & SMS Marketing app will open inside your Shopify admin. You will see an app dashboard with setup instructions. Look for a button labeled Reveal token or Generate credentials. Click this button. Bloomreach will generate an encrypted token that contains your Shopify API credentials in a secure format. This token is sensitive, so treat it like a password.
Copy the entire token value to your clipboard. The token is a long string of characters. Make sure you copy the entire value without truncation. Paste it into a secure text editor or password manager temporarily. You will paste this token into Bloomreach in the next step.
Step 3: Complete the Connection and Authenticate in Bloomreach
Return to your Bloomreach Engagement browser tab. You should still be on the Shopify integration setup page. If you were redirected away, navigate back to Data & Assets > Integrations and find the Shopify integration you started in Step 1.
Look for a field labeled Encrypted credentials or API token. Paste the token you copied from Shopify into this field. Double-check that the entire token is pasted correctly with no extra spaces or characters at the beginning or end.
Click the Save integration or Connect button. Bloomreach will validate the token and establish a secure connection to your Shopify store. This process typically takes 10-30 seconds. You will see a success message confirming that the connection is active. If you see an error, verify that you copied the token correctly and that your Shopify admin account has the required permissions.
Once the connection is confirmed, Bloomreach will begin syncing your Shopify data. This initial sync includes your customer records, order history, product catalog, and any existing customer attributes. Depending on the size of your Shopify store, this first sync may take anywhere from a few minutes to several hours. You can monitor the sync progress in the Bloomreach integration dashboard.
Step 4: Configure Web Pixels for Real-Time Tracking
The initial connection syncs historical data, but to capture real-time behavioral signals like product views, cart additions, and purchase events, you need to enable web pixel tracking. This is what transforms the integration from a one-way data import into a two-way, real-time behavioral engine.
Go back to the Bloomreach Email & SMS Marketing app inside your Shopify admin (you can find it in your Shopify admin under Apps > Apps and sales channels > Bloomreach Email & SMS Marketing). Click into the app dashboard. You will see a setup section that mentions web pixel integration or tracking configuration.
Look for a button or toggle labeled Enable Web Pixel Integration, Activate tracking, or Upgrade scopes. Click this button. Shopify may ask you to authorize additional permissions for web pixel data collection. These permissions allow Bloomreach to track customer behavior directly on your storefront using Shopify’s native web pixel system. Click Authorize or Accept to proceed.
Once web pixel integration is enabled, Bloomreach will automatically inject a tracking pixel into your Shopify storefront. This pixel captures on-site events like product views, add-to-cart actions, checkout events, and purchases. You do not need to manually edit your theme code or inject custom JavaScript. The web pixel system handles this automatically.
Verify the pixel is active: Return to Bloomreach Engagement and navigate to your Shopify integration settings. You should see a status indicator showing that web pixel tracking is “Active” or “Connected.” If you see a warning or error, check that you have enabled the web pixel in the Bloomreach Shopify app and that your Shopify theme supports web pixels (modern Shopify themes do by default).
Mapping the Stream: What Data Natively Syncs and How to Activate It
Once your integration is live, understand exactly what data flows between Shopify and Bloomreach and how to use it for immediate business impact.
Customer Profiles and Marketing Consent
Bloomreach syncs all customer records from Shopify, including names, email addresses, phone numbers, and custom customer attributes. More importantly, Bloomreach syncs your customer consent states. If a customer has opted in to email marketing in Shopify, that opt-in status flows into Bloomreach. If they have opted out, that opt-out status is respected in Bloomreach. This ensures you remain compliant with GDPR, CCPA, and other privacy regulations.
Why it matters: Unified customer profiles eliminate duplicate records and ensure you are not sending campaigns to unsubscribed customers. You can segment based on consent state, build win-back campaigns for opted-out customers, and maintain a single source of truth for customer preferences.
How to use it: In Bloomreach Engagement, create segments based on consent status. For example, build a segment of “Opted-in customers who purchased in the last 30 days” to target for a post-purchase upsell campaign. Use the consent data to exclude opted-out customers automatically from all campaigns.
Order History and Real-Time Purchases
Bloomreach imports your complete Shopify order history during the initial sync. This includes order date, order total, products purchased, discount codes applied, and customer attribution. More importantly, new orders sync in real-time as customers complete purchases on your Shopify storefront. This real-time data enables you to trigger post-purchase campaigns instantly.
Why it matters: Order history is the foundation for calculating customer lifetime value (CLV), recency, frequency, and monetary value (RFM) segmentation. Real-time purchase data allows you to trigger post-purchase onboarding, cross-sell, and loyalty campaigns within minutes of purchase, when customer intent is highest.
How to use it: Build a segment of “Customers who purchased in the last 7 days” and trigger a post-purchase thank-you email with a product care guide. Create an automated workflow that sends a cross-sell email 48 hours after purchase, recommending complementary products based on purchase history. Build a win-back campaign targeting customers whose last purchase was 90+ days ago.
Real-Time On-Site Behavior
The web pixel tracking captures every meaningful on-site event: product views, add-to-cart actions, checkout initiations, and purchases. This behavioral data flows into Bloomreach in near-real-time, creating a complete picture of customer intent before they complete a purchase.
Why it matters: Behavioral data is the earliest signal of customer intent. A customer who views a product but abandons their cart is showing high purchase intent. A customer who browses your store but never adds anything to cart is showing interest but lower intent. This distinction enables precision targeting and prevents wasted marketing spend on low-intent audiences.
How to use it: Build an abandoned cart workflow that triggers an email within 1 hour of cart abandonment, offering a discount or addressing common objections. Create a browse abandonment campaign for customers who view products but never add to cart, sending them educational content or reviews about those products. Use product view data to personalize email content, showing customers products similar to ones they have browsed.
Product Catalogs and Inventory Status
Bloomreach syncs your Shopify product catalog, including product names, descriptions, images, prices, categories, and inventory status. When you update product information or inventory levels in Shopify, those changes sync into Bloomreach automatically. This ensures your campaigns always reflect current product availability and pricing.
Why it matters: Real-time catalog sync prevents you from promoting out-of-stock products, ensures your price-drop alerts show accurate pricing, and enables dynamic product recommendations based on live inventory. Campaigns that reference unavailable products damage customer trust and waste marketing spend.
How to use it: Build a back-in-stock alert campaign that automatically sends emails to customers who viewed an out-of-stock product as soon as inventory is replenished. Create price-drop alert campaigns that notify customers when products they browsed drop in price. Use product attributes like category or price range to personalize product recommendations in your campaigns.
From Integration to Revenue: High-ROI Campaigns You Can Launch Immediately
With your Shopify to Bloomreach integration live and real-time data flowing, you can launch these high-impact campaigns immediately. Each is powered by the native data sync and requires no additional manual data work.
Advanced Abandoned Cart Recovery
Create an automated workflow triggered by the “Add to cart” event captured by your web pixel. When a customer adds items to cart but does not complete checkout within 1 hour, send an email reminding them of the items, the total price, and a limited-time discount code. Use product data from the catalog sync to show the exact items they abandoned with images and descriptions. Segment by customer value: high-CLV customers get a higher discount or free shipping offer, while lower-value customers get a standard reminder.
This single workflow typically recovers 10-15% of abandoned cart value, translating to thousands of dollars in monthly revenue for mid-sized retailers.
Price-Drop and Back-in-Stock Alerts
Set up automated alerts triggered by product catalog changes. When a product that customers have viewed drops in price, send them a notification highlighting the savings. When an out-of-stock product is replenished, notify customers who viewed it. These campaigns are powered entirely by your native data sync, so there is no manual work required to maintain them.
Price-drop alerts typically drive 8-12% conversion rates because you are reaching customers at the exact moment price changes align with their interests.
Post-Purchase Onboarding and Cross-Sell
Trigger a series of automated emails immediately after purchase. The first email goes out within 1 hour, confirming the order and providing tracking information. The second email goes out 24 hours later with product care tips or setup guides. The third email goes out 48-72 hours later with complementary product recommendations based on what they purchased.
Use the order data to personalize these emails. If a customer bought a winter jacket, recommend thermal layers. If they bought a coffee maker, recommend coffee beans or filters. This personalization increases email engagement and drives incremental revenue.
Predictive Win-Back Campaigns
Use RFM segmentation (Recency, Frequency, Monetary value) to identify high-value customers showing signs of churn. For example, segment customers who have spent more than $500 with you but have not purchased in 60+ days. Send them a win-back email with a special offer, asking for feedback on why they have not returned, and highlighting new products they might like.
Win-back campaigns targeting high-CLV customers typically see 5-8% response rates and recover customers who would otherwise be lost forever.
Critical Pitfalls to Avoid During Setup
Even with a straightforward integration, common mistakes can break your data flow or cause duplicate tracking. Avoid these pitfalls.
Mistake 1: Neglecting Historical Data Import Limits
During the initial sync, Bloomreach imports your Shopify customer and order history. However, some Shopify stores have very large datasets (millions of customers or orders). Bloomreach may have limits on how much historical data can be imported in the first sync, or the import may take longer than expected. Plan for this. Do not assume all your historical data will be available immediately in Bloomreach. Check the sync status in the Bloomreach integration dashboard and confirm that historical data has fully imported before launching campaigns.
Mistake 2: Leaving Old Tracking Scripts Active
If you previously had custom tracking code or a different pixel injected into your Shopify theme, and you do not remove it before enabling the Bloomreach web pixel, you will have duplicate event tracking. This causes inflated event counts, inaccurate reporting, and potential data conflicts. Before enabling the Bloomreach web pixel, audit your Shopify theme code and remove any old tracking scripts or pixels from previous integrations.
Mistake 3: Forgetting to Sync Consent States Correctly
Bloomreach syncs consent states from Shopify, but only if your Shopify store is correctly capturing consent. If your Shopify store is not using a consent management tool or is not capturing opt-in status properly, Bloomreach will not have accurate consent data. This can lead to compliance violations. Before connecting, audit your Shopify consent setup and ensure you are capturing customer opt-in status for email and SMS.
Mistake 4: Not Enabling Web Pixel Integration
The initial connection syncs historical data, but many teams forget to enable web pixel tracking. Without web pixels, you are missing real-time behavioral data, and your campaigns rely only on historical purchase data. You lose the ability to trigger abandoned cart campaigns, browse abandonment campaigns, and other real-time behavioral automations. Always complete Step 4 (Configure Web Pixels) before launching campaigns.
Mistake 5: Assuming All Webhooks Are Active by Default
Bloomreach uses webhooks to sync real-time purchase events from Shopify. In some cases, webhooks may not activate automatically, or they may be disabled if your Shopify store configuration changes. Periodically check your Bloomreach integration dashboard to confirm that webhooks are active and events are flowing in real-time. If you notice that purchase events are delayed or missing, check the webhook status and re-enable if necessary.
Tools and Data You Need
| Data Source | What It Provides | How to Verify | Impact on Campaigns |
|---|---|---|---|
| Shopify Customer Data | Names, emails, phone numbers, custom attributes | Check Shopify Admin > Customers and confirm records appear in Bloomreach | Enables basic segmentation and email targeting |
| Shopify Order History | Transaction dates, amounts, products, discounts | Check Bloomreach Engagement > Customer profiles and confirm order history is visible | Enables RFM segmentation, CLV calculation, and purchase-based targeting |
| Web Pixel Events | Product views, add-to-cart, checkout, purchase | Enable web pixel in Bloomreach Shopify app and check event stream in Bloomreach dashboard | Enables real-time behavioral triggers and abandoned cart campaigns |
| Product Catalog | Product names, images, prices, inventory status | Check Bloomreach > Catalog and confirm products match Shopify | Enables dynamic product recommendations and back-in-stock alerts |
| Customer Consent | Opt-in/opt-out status for email and SMS | Check Bloomreach customer profile consent field and verify it matches Shopify | Ensures GDPR/CCPA compliance and prevents sending to unsubscribed customers |
| Shopify Admin Credentials | API token for secure authentication | Generate token in Bloomreach Shopify app and paste into Bloomreach Engagement | Enables secure, encrypted connection between platforms |
How to Measure Success
After launching your Shopify to Bloomreach integration, track these metrics to confirm the integration is delivering business value.
Data Sync Health: Monitor the number of customer records, orders, and events syncing into Bloomreach. In your Bloomreach integration dashboard, you should see the sync status showing “Active” and a count of synced records increasing over time. If the count is flat or decreasing, the sync has broken and you need to troubleshoot.
Email Engagement on Behavioral Campaigns: Launch your first abandoned cart email campaign and track open rates, click rates, and conversion rates. Abandoned cart campaigns powered by real-time behavioral data typically see 20-40% open rates and 2-5% conversion rates. If your rates are significantly lower, your segmentation or email content may need refinement.
Revenue from Recovered Carts: Track the revenue generated by your abandoned cart recovery campaign. This is one of the highest-ROI campaigns you can run. Most retailers see a return on investment within the first month.
Customer Segment Growth: In Bloomreach, monitor the size of your key segments (e.g., “Purchased in last 30 days,” “High-CLV customers,” “At-risk churners”). These segments should grow as new customer data syncs in and should remain stable over time if your data quality is good.
Campaign Trigger Latency: Measure the time between a customer action (e.g., adding to cart) and the time they receive a campaign email. With real-time web pixel tracking, this latency should be 1-5 minutes. If latency is hours or days, your web pixel may not be active or your webhooks may be delayed.
Customer Lifetime Value Trend: Track your overall CLV before and after launching the integration. With better segmentation, more timely campaigns, and higher engagement, CLV should increase within 30-60 days.
How Voxwise Can Help
Connecting Shopify to Bloomreach is technically straightforward, but optimizing the integration for maximum business impact requires strategic planning, advanced campaign design, and ongoing refinement. This is where Voxwise adds value.
Voxwise is a certified Bloomreach implementation and consulting partner specializing in CRM, customer engagement, customer data, marketing automation, and personalization for retail and e-commerce brands. Our team has implemented this exact integration for dozens of Shopify merchants, from small DTC brands to large enterprise retailers. We understand the technical architecture, the common pitfalls, and the advanced configuration options that drive the highest ROI.
What Voxwise does for your Shopify-Bloomreach integration:
We audit your current Shopify setup and Bloomreach configuration to identify gaps and optimization opportunities. We design advanced customer data mapping strategies that ensure your customer profiles are clean, deduplicated, and enriched with the right attributes for segmentation. We build your initial high-impact campaigns, including abandoned cart recovery, post-purchase onboarding, and win-back workflows, all powered by your new data stream. We configure advanced behavioral tracking and custom events to capture the specific customer actions that matter most to your business. We establish ongoing monitoring and optimization, tracking key metrics and refining campaigns based on performance data. We train your team on Bloomreach best practices, campaign design, and how to leverage your customer data for strategic advantage.
The result is a fully optimized integration that drives measurable revenue growth, faster time-to-first-campaign, and a customer engagement engine that scales with your business.
Conclusion
Connecting Shopify to Bloomreach Engagement is the foundation of modern customer engagement for e-commerce retailers. The native integration is straightforward to set up, but the real value comes from how you use the unified customer data to build smarter, faster, more personalized campaigns. With real-time behavioral tracking, unified customer profiles, and native automation, you can recover abandoned carts within hours, send post-purchase campaigns within minutes of purchase, and build predictive win-back campaigns based on actual customer value.
The integration is live in four steps. Your data is flowing in real-time. Your campaigns can launch immediately. The question is not whether to connect Shopify to Bloomreach, but how quickly you can optimize the connection to drive revenue growth.
How Voxwise Can Help You Optimize Your Setup
Your Shopify to Bloomreach integration is just the beginning. To unlock its full potential, you need strategic guidance on customer data architecture, advanced campaign design, and ongoing optimization.